Using Incoming Manifests in Fixably
Fixably’s new Incoming Manifests feature creates a more convenient and consistent workflow for pre-booking and receiving large batches of devices into your Fixably tenant.

Written by Annukka Matilainen
Updated at May 19th, 2026
- Release Notes
- Newly Released Features
- Getting Started
- Roles & Permissions
- Manifests
- Order Management
- Automations
- Employee Management
- Customer Management
- Customer Portal
- Stock Management
- Part Requests
- Price Lists
- Invoicing
- Reporting
- Custom Fields
- Integrations
- GSX
- Shipments
- Service Contracts
- Configuring Your Environment
- Incoming Part Allocation
- Appointment Booking
Table of Contents
Table of Contents
What are Manifests
Using Manifests
Creating a Manifest
Adding Items to Manifests
Receiving a Manifest
Processed Manifests
Viewing Manifest Data in Orders
Additional Details
What are Manifests?
- Who is it designed for? - Fixably Depot and other high volume providers that receive devices in Batches.
- When a depot buys devices or gets a service request, there are 3 main formats in which they could receive the information:
- Fully Manifested Shipments: Device Manufacturer, Model, Colour, Capacity, and specific devices (Serial or IMEI) will be listed
- Partially Manifested Shipments: Device Manufacturer, Model, Colour, and Capacity may be known, but no specific device identifiers are listed (no Serial or IMEIs)
- Unmanifested Shipments: No prior notice of what specifically they are getting
- Fixably’s Incoming Manifest feature creates a more convenient and consistent workflow for pre-booking and receiving large batches of devices into your Fixably workflow.
- For more details, please reach out to customer.success@fixably.com
Using Manifests
- From the Navigation Sidebar, click Manifests and then Incoming.

- You'll see a list of Manifests that are pending receiving

- Click on any of the Pending Manifests to reveal a list of the expected items.

Creating a Manifest
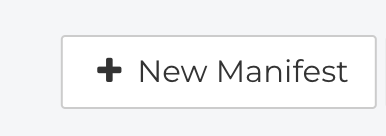
- From Pending Manifests, click the New Manifest button.
- Fill out the Manifest creation form.
- Manifest Number: Fill in if you want to use a specific value. Fixably will automatically generate the number if the field is left empty. This value can be searched in the Universal Search Bar.
- Customer - Select a customer profile from your existing Fixably customer database.
- Reference - Add a reference number if desired. This value can be searched in the Universal Search Bar.
- Location - If your tenant has multiple locations, select the one these devices will be received into.
- Tracking Number - Add a tracking number. This value will be automatically added to the Incoming Tracking Number section of the Orders created from the manifest.
- You can also use Tasks with Manifests.
- Admins can make certain Tasks visible in the Manifest form.
- This field will update the corresponding Task field for each Order linked to the Manifest.
- This allows Manifests to support more detailed workflows containing additional data points.
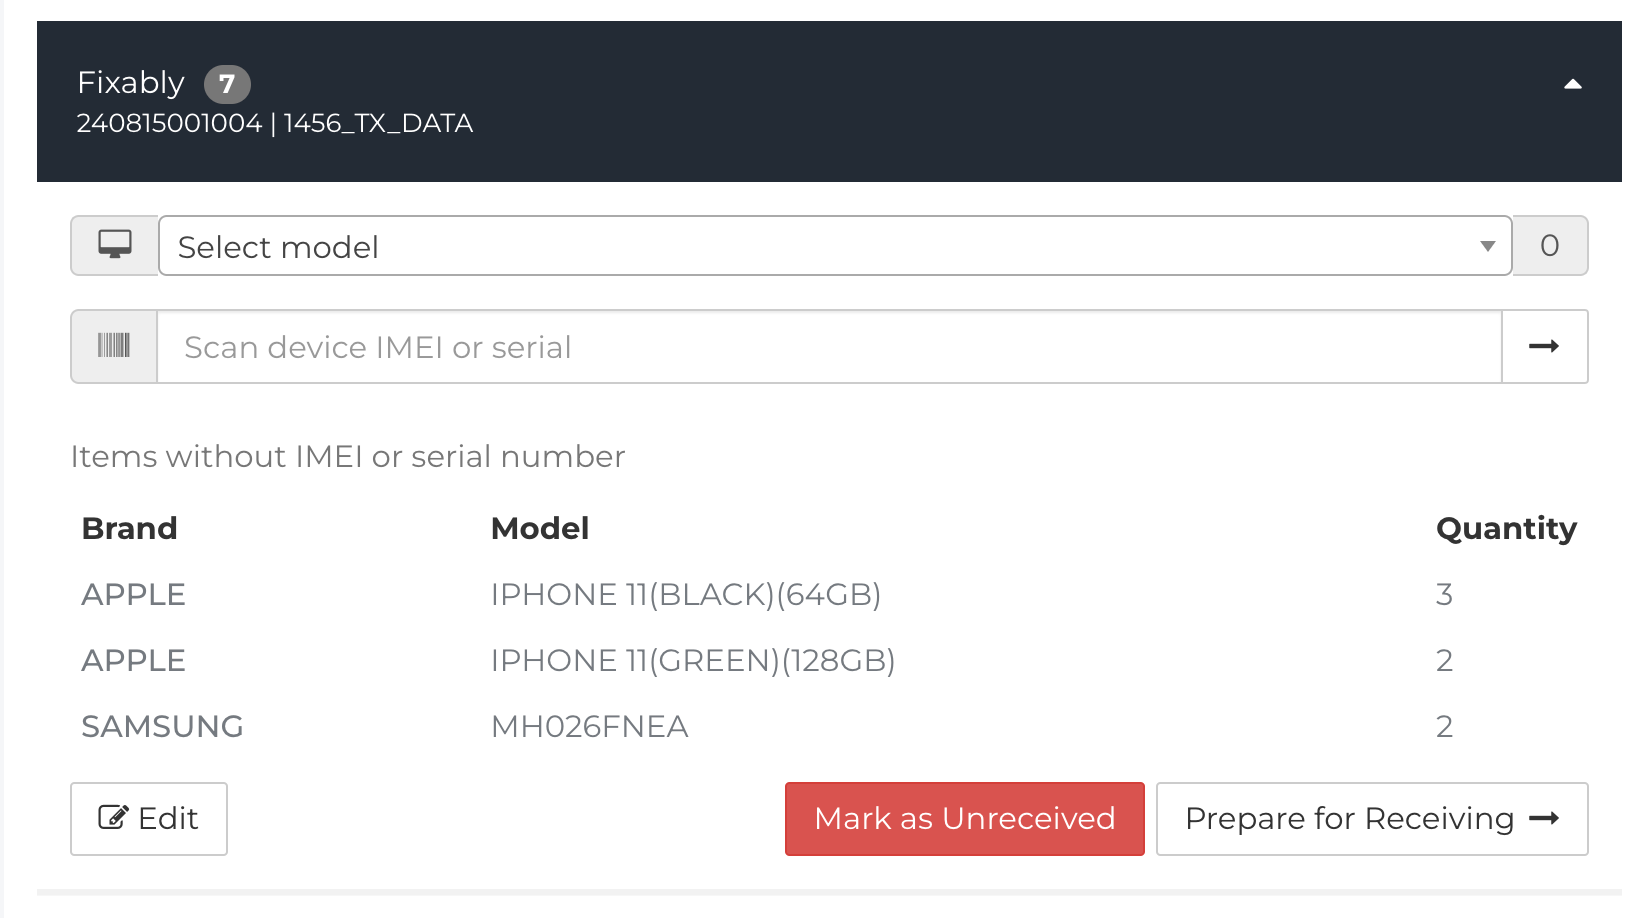
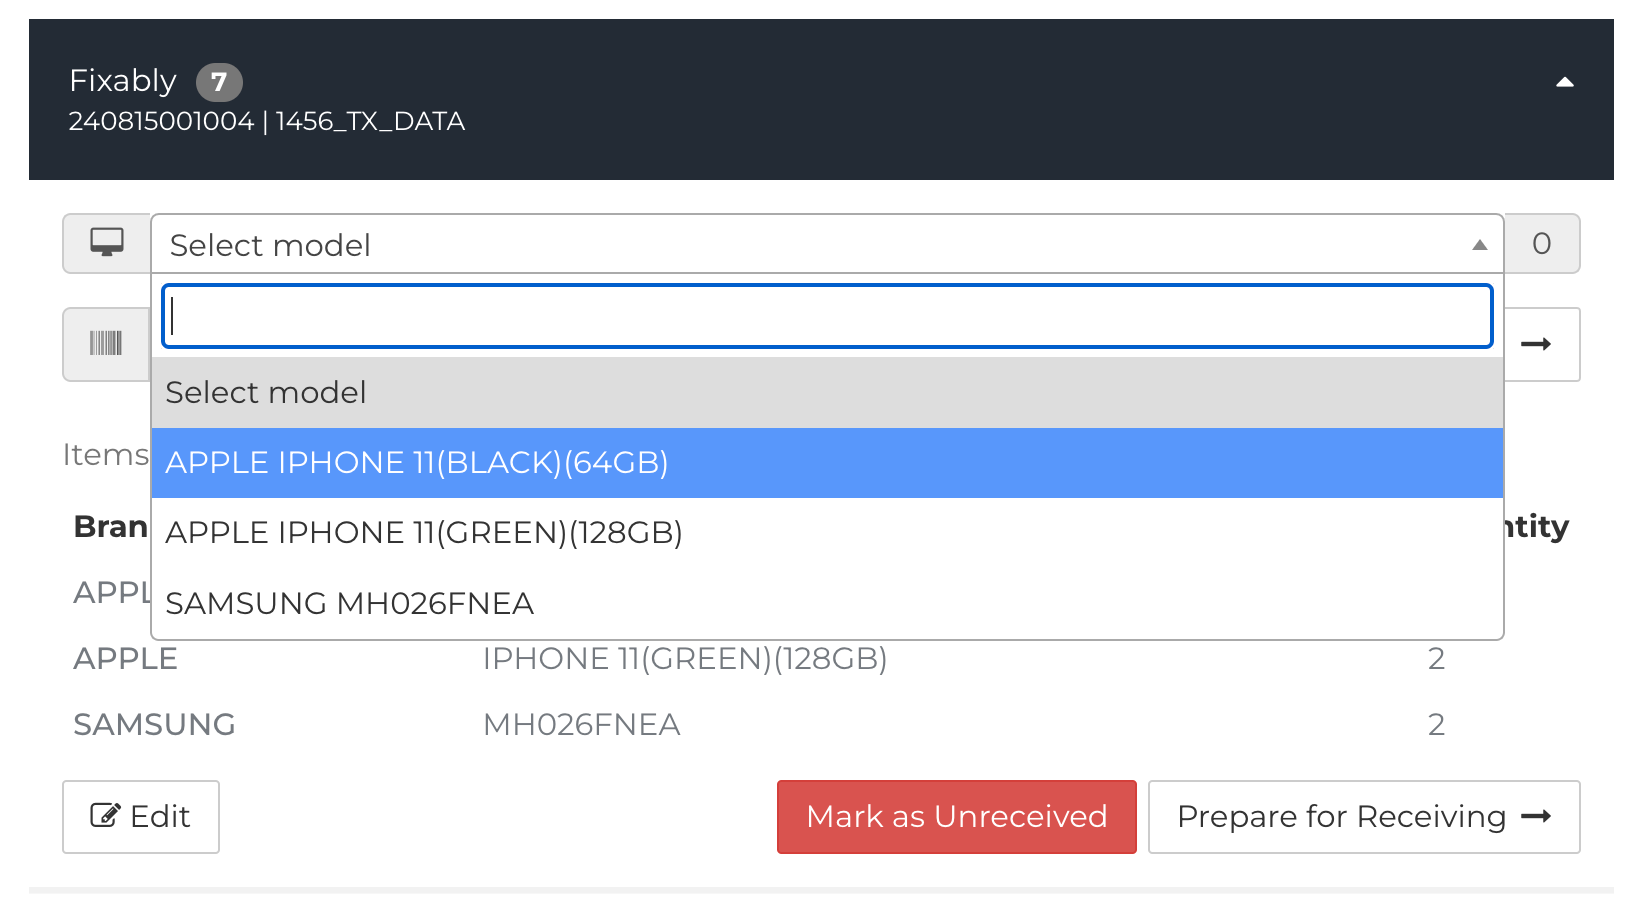
Adding Items to Manifests
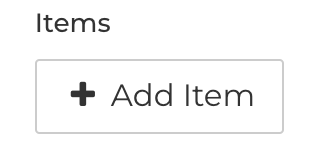
- Click the Add Item button.
- There are multiple ways to approach adding Items to your Manifest. The method you choose will depend on what information you have available about the devices at this stage in the process.
- If you know exactly what items you will be receiving (specific Serial Numbers or IMEIs), you can add them to the Manifest.
- Click the radio button for IMEI or Serial Number.
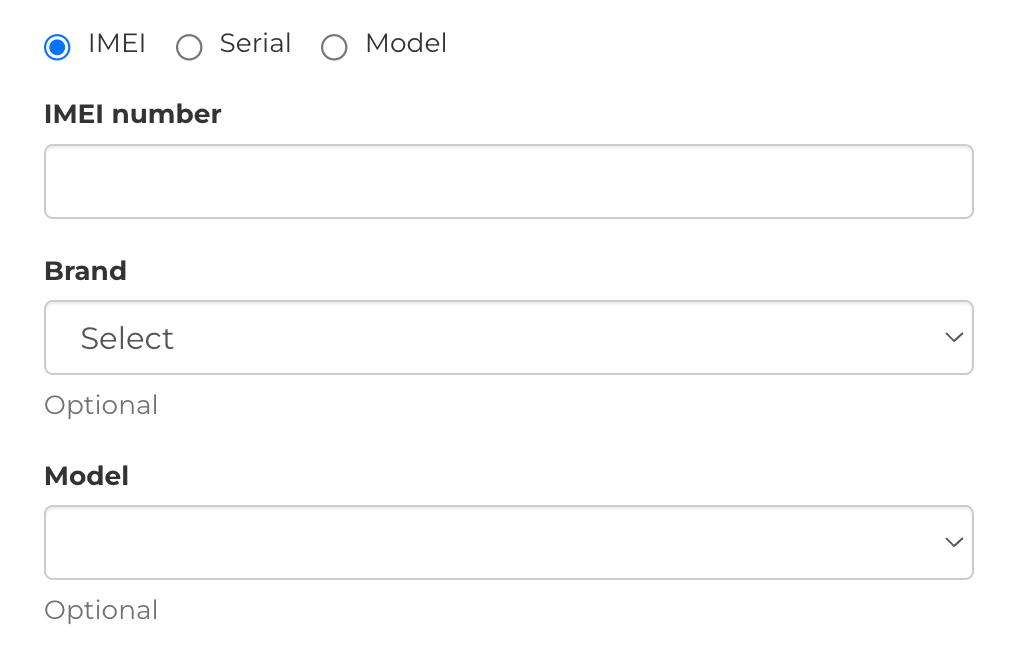
- Add the IMEI Number
- Add or Select the Brand and Model.
- These fields can be configured as both a Text field or a Drop Down menu with preset Device Models. For assistance, please reach out to Fixably Support.
- These fields can be configured as both a Text field or a Drop Down menu with preset Device Models. For assistance, please reach out to Fixably Support.
- Add an additional item by clicking the New Item button again.

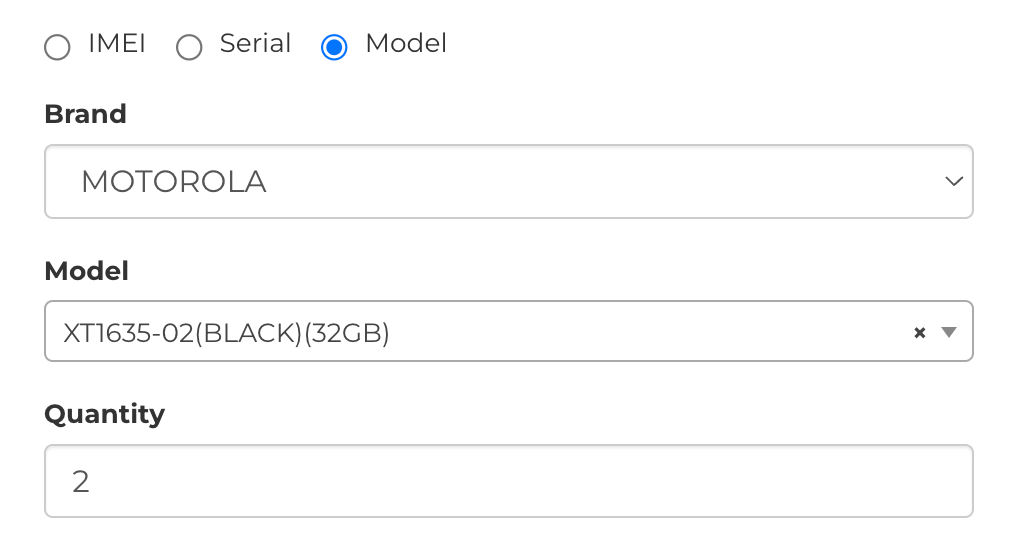
- If you do not know exactly what Serial Numbers you will be receiving, you can also create a Manifest with only Devices and Quantities listed.
- Click the Model Radio Button.

- Add or Select the Brand and Model.
- These fields can be configured as both a Text field or a Drop Down menu with preset Device Models. For assistance, please reach out to Fixably Support.
- These fields can be configured as both a Text field or a Drop Down menu with preset Device Models. For assistance, please reach out to Fixably Support.
- Add the Number of Items you are expecting to the Quantity field. When we receive the devices, we'll add the individual serial numbers or IMEIs.
- Repeat the process for any additional models you have.
- When you're done, click Save.

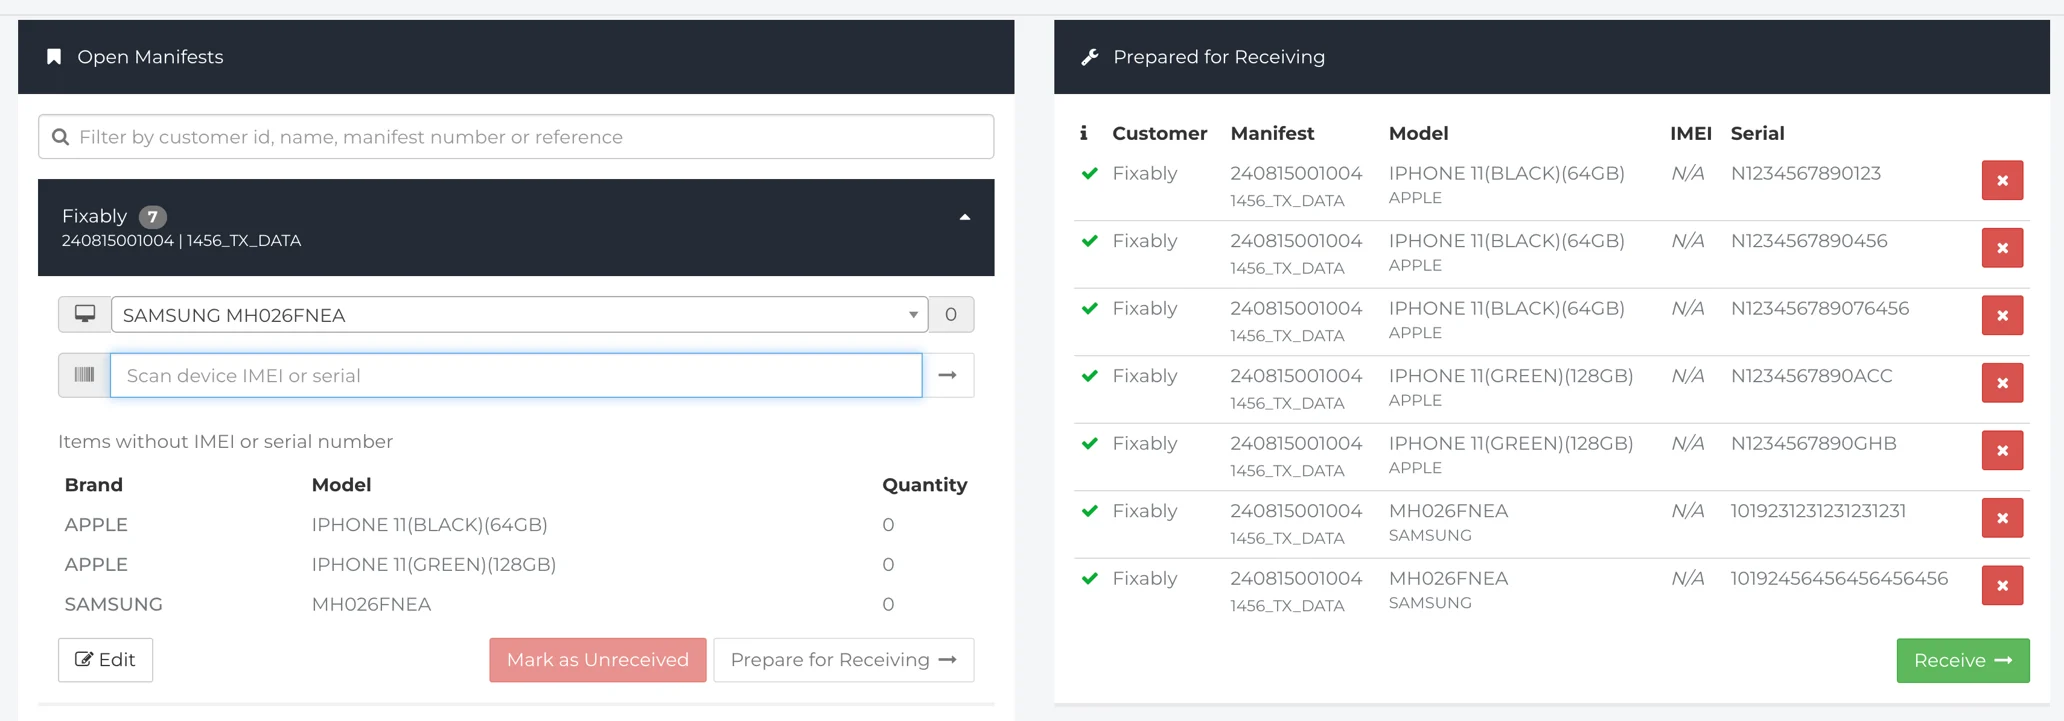
Receiving a Manifest
- From Pending Manifests, click on the Manifest you want to receive.
- Select the Model of the Device from the drop-down menu.
- Scan (or type) the Serial Number or IMEI and press the Enter Key (or click the arrow button).
-
Consider setting a carriage return on your barcode scanner to save an input with each device.
-
Consider setting a carriage return on your barcode scanner to save an input with each device.
- As you receive devices, you see them added to the Prepared for Receiving section. You'll also see the quantities of devices left to be received will change.
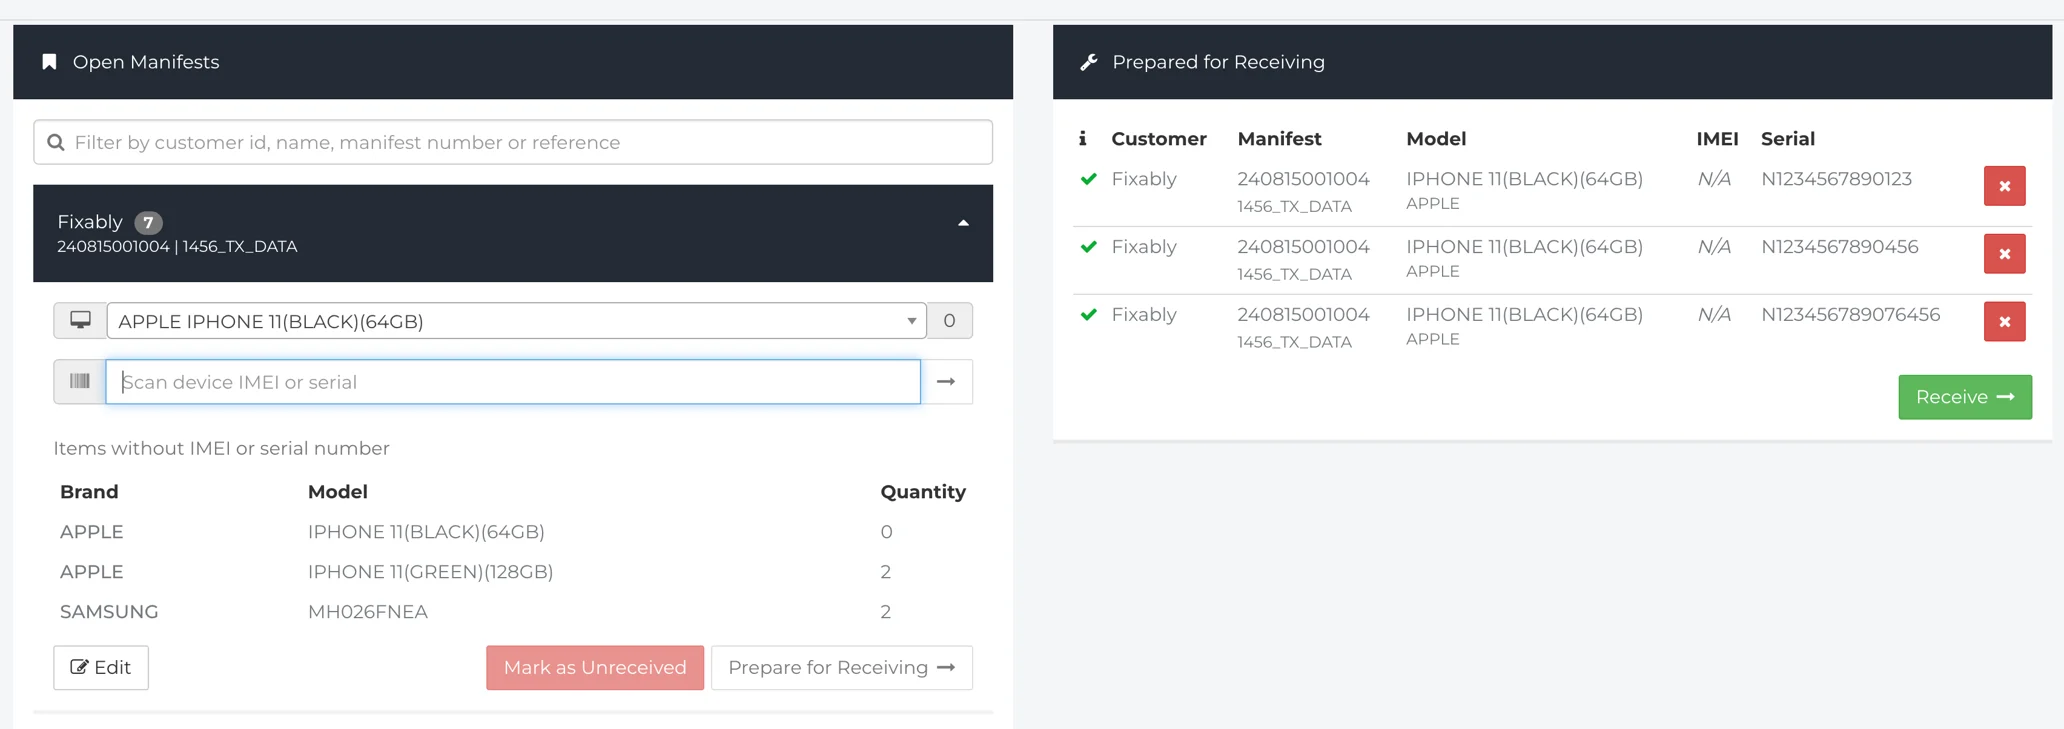
- Select your next model and repeat the process.

- At anytime, you can click the Receive button to fully receive the items added to the Prepared for Receiving section. This will create live Orders with the details from the Manifest.
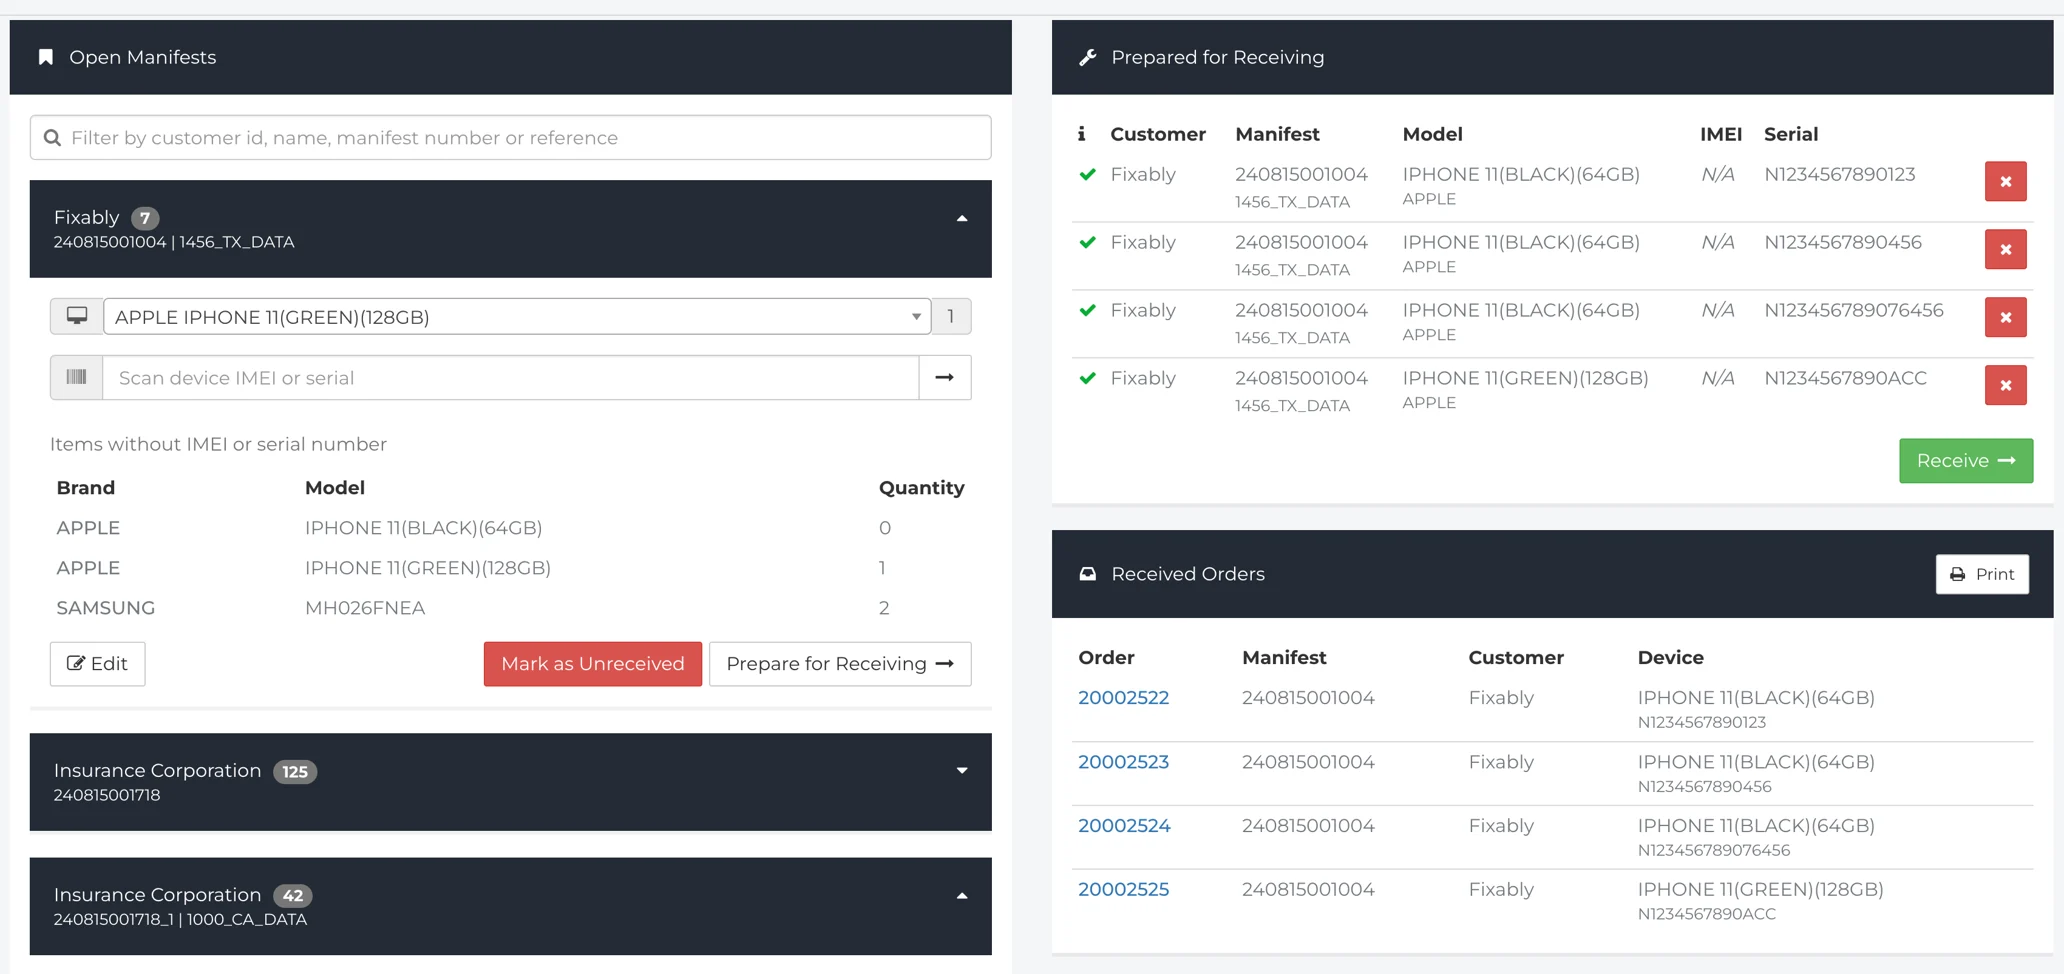
- Once you have received all items in a Manifest, the buttons will be greyed out and you will not be able to receive more items.
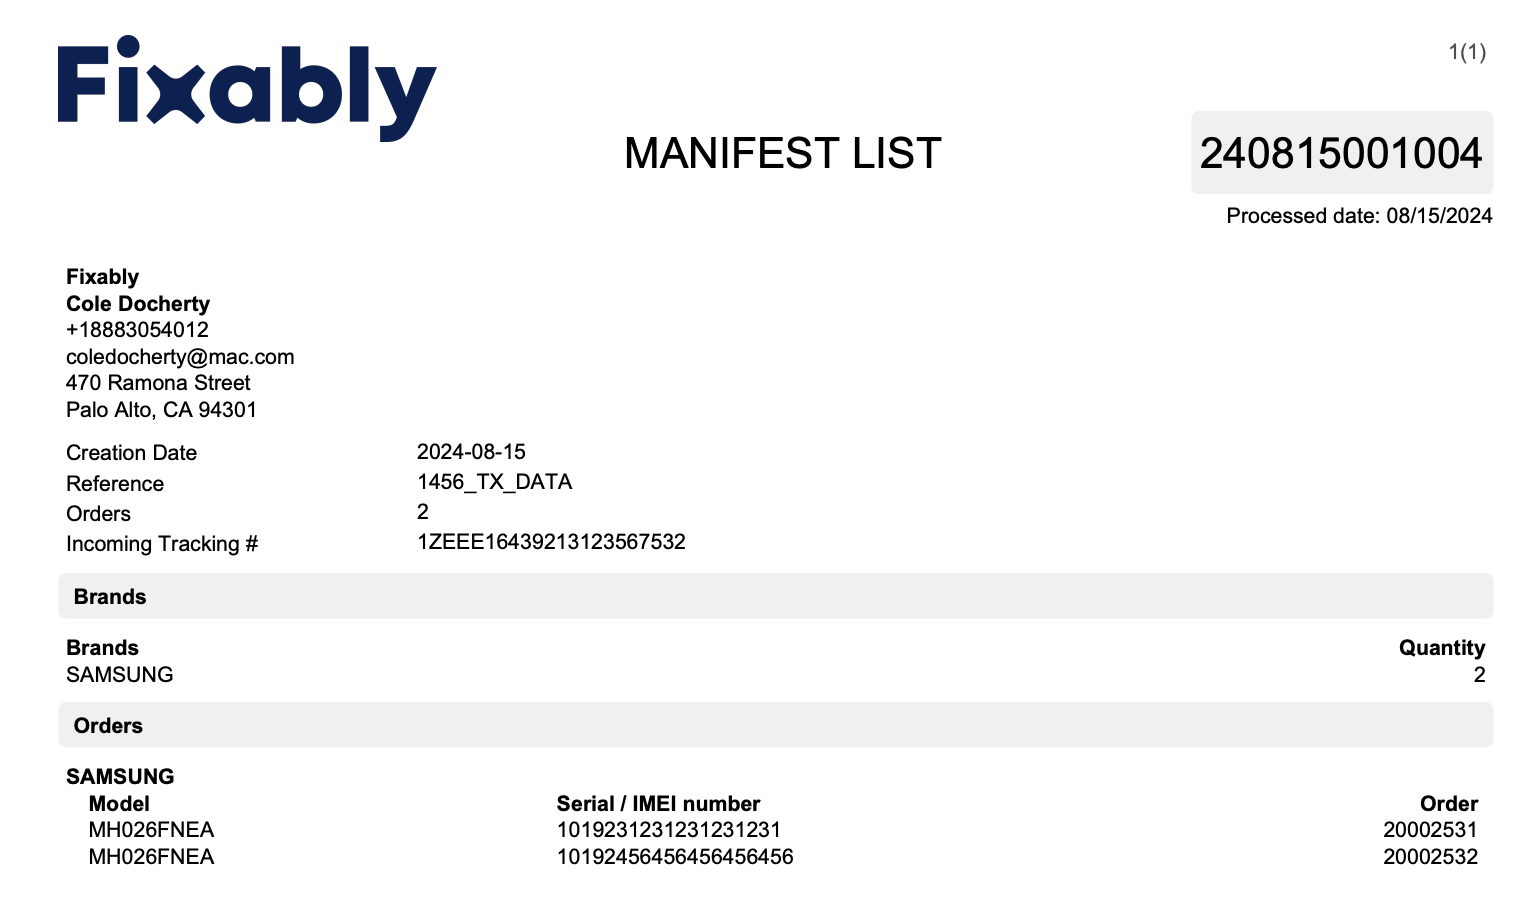
- If you need to print a simple PDF document of the Manifest, click the Print button under Received Orders.
Processed Manifests
- To view Processed Manifests, click the Processed Incoming Manifests button under Manifests in the Navigation Sidebar.

- A list of received items will be displayed. You can also easily access each individual Order from the list
.
- Use the Search field to narrow your selection. You can also use the Actions button to export your Manifest as an XLS file. This export will contain any Task and Tracking Number details that are associated with the Manifest.

Viewing Manifest Data in Orders
- Once Orders are created from a Receiving Manifest, the data will be visible in the Order View.

- The data from any Tasks connected to the manifest is visible in the main Task section of the Order.
Additional Details
- You can search for the Orders associated with a Manifest using the Universal Search Bar.

- Use the Paramater manifestNumber: to search for the Manifest #.
- Use the Parameter manifestRef: to search for the Manifest Reference.
- Standard Reports Updates
- Added a new reporting filter for the Manifest Number
- This is available within Standard and Custom Reports. Please reach out to Fixably support for information.