How can I use AzureAD with Fixably?
This article is a step-by-step guide to help Fixably Administrators enable AzureAD authentication and secure sign-on in your Fixably environment.

Written by Annukka Matilainen
Updated at September 25th, 2024
- Release Notes
- Newly Released Features
- Getting Started
- Roles & Permissions
- Manifests
- Order Management
- Employee Management
- Customer Management
- Customer Portal
- Stock Management
- Invoicing
- Reporting
- Custom Fields
- Integrations
- GSX
- Shipments
- Service Contracts
- Configuring Your Environment
- Part Requests
- Incoming Part Allocation
Table of Contents
First Steps
- AzureAD authentication is not available with all subscription plans. Please reach out to your Customer Success Manager for more information.
- Fixably Support must enable AzureAD in your environment before a company administrator follows the settings below.
Enabling AzureAD
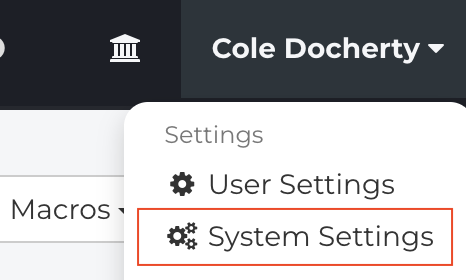
- From the Fixably Home Screen, click on your User Name menu and then System Settings.
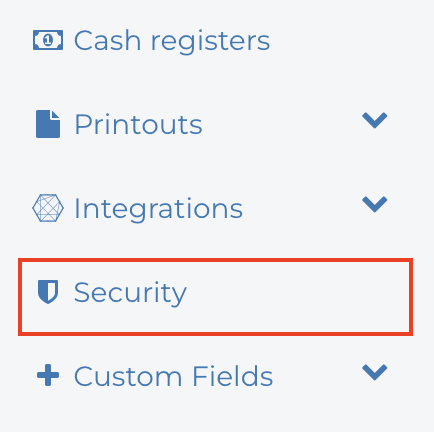
- From the settings menu, click Security.
- Under Select third-party authentication, select AzureAD.

- Login to your company's Microsoft Azure account.
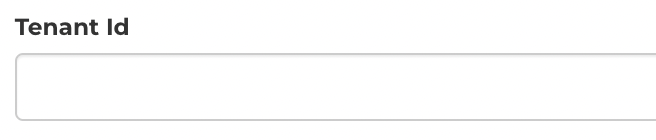
- From the Overview page, copy the Directory ID to the Tenant ID field in Fixably.
- Copy the Application ID to the Client ID field in Fixably.

- From the Certificates & secrets page, click New client secret. Add a description and Save. Copy the value from Azure to the Client Secret field in Fixably.

- If applicable, fill in the Scope field. This can also be left empty.

- Clicking Disables default login method will disable the default login method where the User is prompted for a Username and Password.

- Clicking Account required before login will require a User account to exist in the system before the User can use the AzureAD account to login.

- When complete, click Save Settings.

User Sign-in with AzureAD Enabled
- Once configured, Fixably will replace the traditional Username and Password fields with a Sign in with Microsoft button.

- The User can sign into your Fixably environment using their company AzureAD credentials.