How can I use the Customer Portal to take Stripe payments online?
This article is a step-by-step walkthrough to help Users process online payments using Stripe.
- Release Notes
- Newly Released Features
- Getting Started
- Roles & Permissions
- Manifests
- Order Management
- Automations
- Employee Management
- Customer Management
- Customer Portal
- Stock Management
- Part Requests
- Price Lists
- Invoicing
- Reporting
- Custom Fields
- Integrations
- GSX
- Shipments
- Service Contracts
- Configuring Your Environment
- Incoming Part Allocation
- Appointment Booking
Creating a Portal checkout invoice:
To create a “Portal checkout” invoice, the order you are invoicing, has to have a user that has an email and has a login. This is because the invoice can not be paid unless the user can log-in to the portal. An email is required so the user can be notified of the invoice and possibly be given a direct link to the checkout url via an automation.
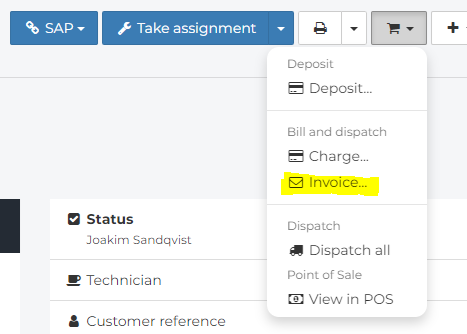
To create a Portal checkout invoice, add an orderline to an order as you would normally do. After that choose the invoicing option from the context menu located in the top of the page.

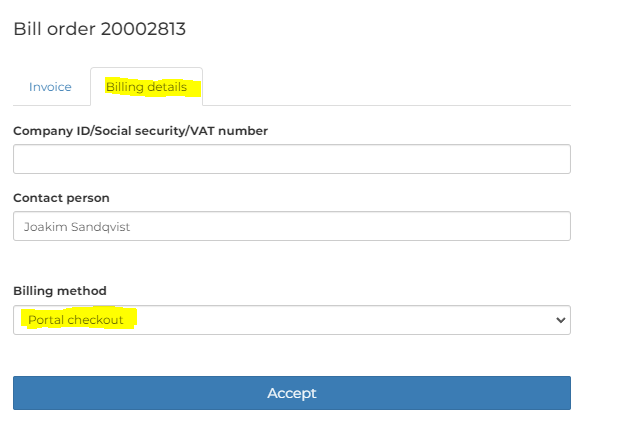
Once clicked, choose the “Billing details” tab from the invoice form and select “Portal checkout” as the billing method.

Paying a Portal checkout invoice with Stripe:
To pay a “Portal checkout” -invoice. Open the order in question in portal or use the direct url of the invoice in question that was received in the email.
Also an another email will be sent to the customer with the amount that has to be paid.
If you chose to access the invoice via the order, you will see a list of invoices in the order-view.
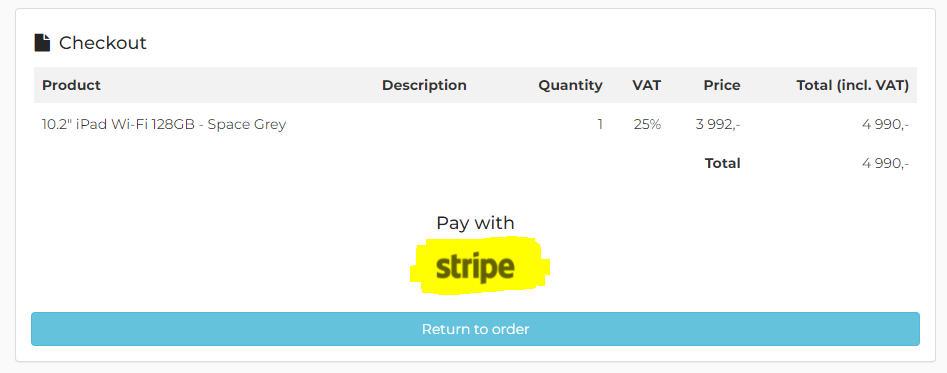
Click the “Checkout” button of the invoice you wish to pay.

Click on the Stripe logo on the checkout page to proceed with the checkout.

Once clicked, you can proceed to pay the invoice.
Note: The payment will fail if the total amount to charge is too small. The minimum amounts depend on the currency.
More about minimum charging amounts here:  Supported currencies
Once the order is paid, you can return to the order view and view the receipt of the payment by clicking on the “Print” button of the invoice in question.
